
Sometimes when creating audio content, you may not notice until you are done recording that your audio sounds all echo-y with reverberations. While this may be annoying, you can clean it up and remove echo from audio as well as reverberations.
As a content creator, you will most likely be working from a home studio, and if that is the case, you will encounter background noises, echo, and reverberations a lot. No matter how quiet the studio is, a condensed mic will pick up any and every noise it hears, including wind movements, etc.
It goes without saying that this makes for the most unpleasant listening experience that will send listeners running for the hills.
So, how do you tackle this unwanted noise? Simple, by removing them. You cannot afford to upload your audio filled with unpleasant noise and distracting from the main content. Your goal is always to give your listeners a good experience, especially as a podcaster, so here are 4 easy ways to remove echo and reverb from audio.
In this article
Part 1. How to Remove Echo from Audio Online with AI Echo Remover
It is a good thing that your audio file doesn't have to be stuck with any unnecessary noise anymore because there are easy ways to clean them up quickly online.
How to Remove Echo in Media.io
One of the best tools you will need as an audio creator is Media.io. It has everything you need to give your podcast and any other audio file a huge facelift, such as noise removal.
It is the easiest tool to use for this as it has very straightforward steps and an interface that is simple to navigate with just a single click.
Media.io uses AI to auto-detect all kinds of unwanted noise and remove them with utmost quality and precision, leaving you with clean and high-quality audio files. It is also completely free and online and requires no apps or Dereverb plugin installation to work.
Here is how Media.io can remove echo, reverberation, and background noises from audio with a click.
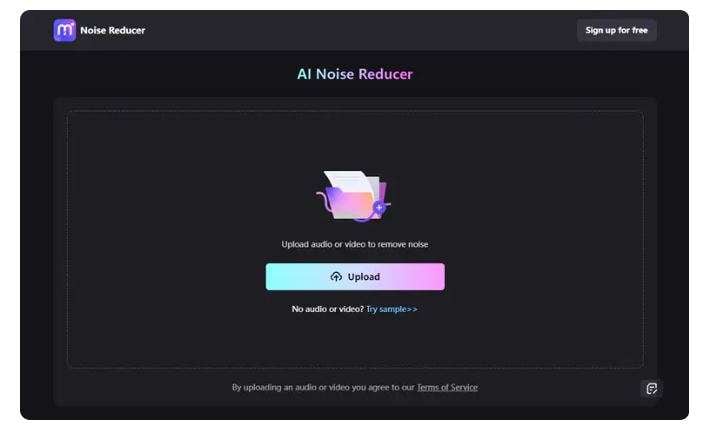
Step 1. Upload audio file
Launch media.io in your browser and upload your audio file that needs echo, reverb, and background noise removal.
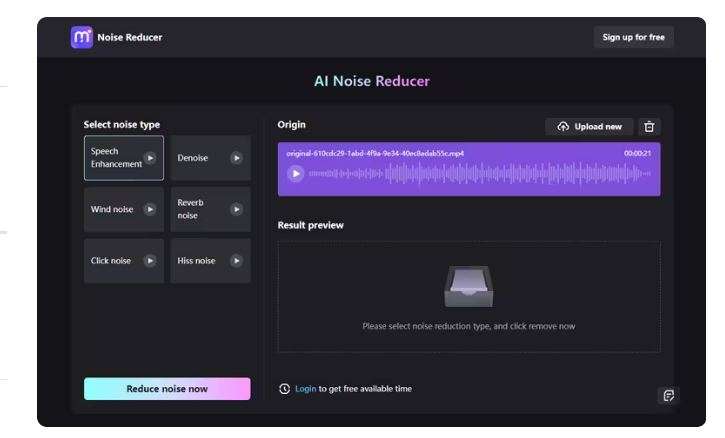
Step 2. Start the cleaning process
Choose the type of noise you want to delete from your audio file and start cleaning it instantly.
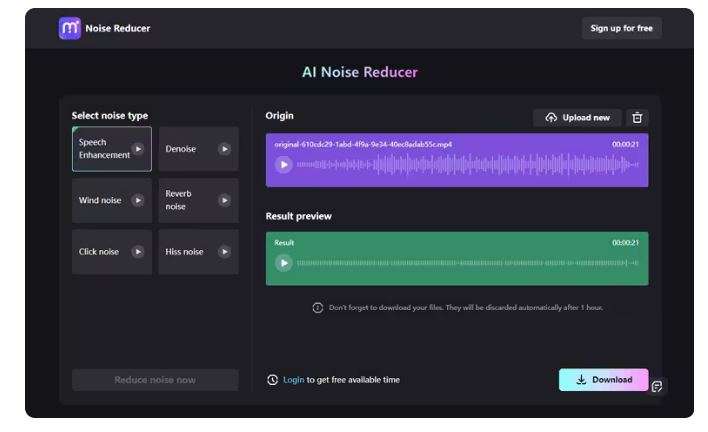
Step 3. Download the file to save after and echo the noise has been removed
You can check and preview the file, then download it to save your cleaned files.
The steps are pretty simple. Here is what each step should look like when you want to remove reverb from audio using Media.io
Step 1
Step 2
Step 3
Part 2. How to Remove Echo in Audacity
The Audacity noise reduction tool is perfect for completely reducing or eliminating noise from your audio files. It is a free and open-source editor, making it a very popular choice for editing audio, and it also has advanced features that can go as far as removing wind noises.
This guide will show you how to reduce or remove reverb, echo, and all unwanted noises from your podcasts and audio recordings using Audacity.
Step 1. Open a test file
The first step to remove reverb and noise from an audio file in Audacity is to either open or create a test file in Audacity.
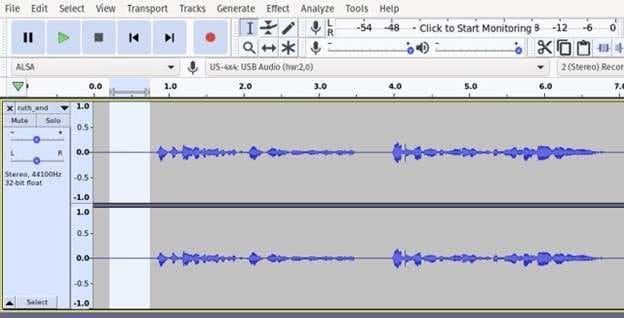
Step 2. Locate and mark the noisy section on the audio timeline
Highlight the portions where you have echoes, reverbs, and background noises, and if this is the entire file, then highlight any portion of the timeline that doesn't contain voices or any important sounds.
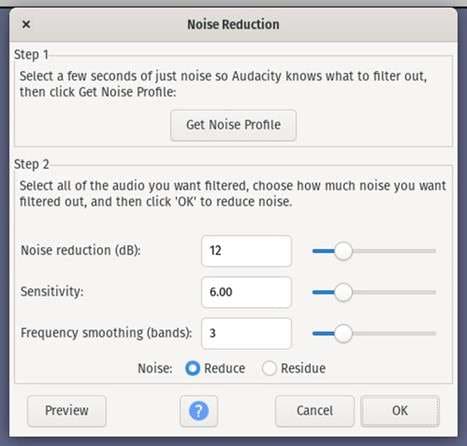
Step 3. Open the noise reduction effect
Click 'Effect' and 'Noise Reduction,' and a pop-up will open.
Step 4. Select Noise Profile
Once you have selected the noisy section, a Noise Reduction pop-up will open; click 'Profile,' then click 'OK.'
Step 5. Select the entire track
Select the track from which you want to remove echo and other noises by either clicking CTRL+A on your keyboard if you're going to remove the same noise profile from all tracks or using your cursor to select the track that needs cleaning.
Step 6. Remove the Noise
Now, go back to 'Effect,' click on 'Noise Reduction,' and click on 'OK' when the pop-up appears this time around. Audacity will now remove all noise associated with the profile you have chosen.
When it is done, your track should be cleaner than how it was, free of noise, echoes, and reverberations.
Part 3. How to Remove Audio Echo in Adobe Audition
Be it echoes, reverberations, wind, hosts gone wild, or instruments that sound scratchy, there is always a need to clean up an audio file. Adobe Audition offers the perfect solution to help you have pleasant audio that sounds great.
We will show you how to use Adobe Auditions to reduce echo from your video files in a few steps. Here are five basic steps to do this.
Step 1. Pick audio
The first step is to load the audio project you are working on in Audition, then choose the audio file that needs echo and reverberation removal. You can also choose an area that may seem quiet but may have the ambient noise caused by an unsuspecting recording device.
Next, select "Capture Noise Print" from the menu when you right-click the potion. This will help the Audition noise removal too to differentiate the primary studio sound from background noises.
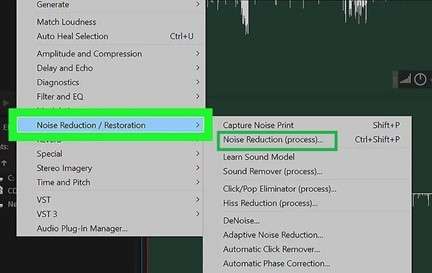
Step 2. Start noise removal
Once you have selected the noise you want to remove, go to "Effects," click on "Noise Reduction/Restoration," and "Noise Reduction (process). When you have selected "Select Entire File," play your audio file again to see whether the noise has been removed successfully!
If you want to make this noise-gating effect more noticeable, you can go to the Advanced tab and lower the Spectral Decay Rate. If you are satisfied with the adjustments, click "Apply" and make the changes permanent.
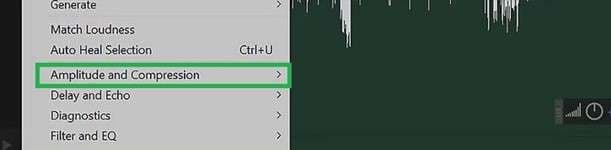
Step 3. Add effects
At this point, go to the 'Effect" menu and select "Dynamic Processing" after clicking on "Amplitude and Compression." This will load effects like compression, which you can use to modify the waveform. A diagonal line that runs from one side of the processing display to the other should be seen when you launch the program.
The more you drag this line, the tinier it becomes and bends below the default route. You can experiment with the effects and compare the result with the old audio until you are satisfied.
Step 4. Apply the effect
When you are done adjusting the Dynamics Processing Settings and are satisfied with the result, make sure your complete waveform is chosen, then click OK to apply the effect.
When you successfully apply these changes, your audio file's amplitude or loudness will reduce. Still, you can restore it to its original level by going to "Effects" and clicking on "Amplitude and Compression," then clicking "Normalize" from the menu bar.
Step 5. Clean up the audio
It is now time to clean up the unwanted echoes from the frequencies and make your audio file pleasant.
Select "Effects," then "Filter and EQ," and "Parametric Equalizer next from the menu. You will see seven primary frequency bands to work with and also a low-pass and high-pass band devoted to their specific functions.
When you encounter a harsh sound, amplify one band first, then gently move across the frequency range until you reach the next band. Keep going until you bring the band below 0 dB so that it can remove some of the unwanted roughness.
Part 4. How to Remove Echo in Adobe Premiere Pro
Adobe Premier Pro is another tool you can use to remove echoes from audio, and here is how you can use it to clean your audio file.
Step 1. Find EchoRemover
In Premiere Pro, you will find EchoRemover AI in the Effect menu when you click "Audio Effects," "AU," and "Crumplepop.
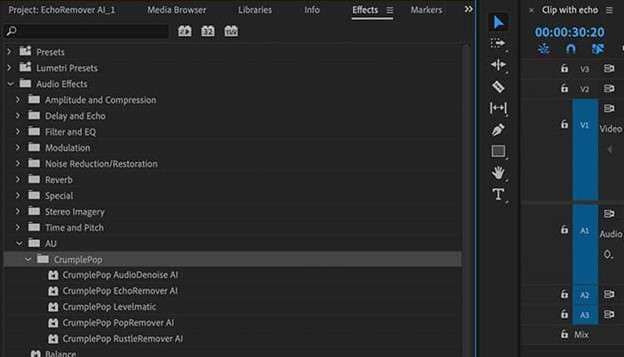
Step 2. Select the audio file and add the effect
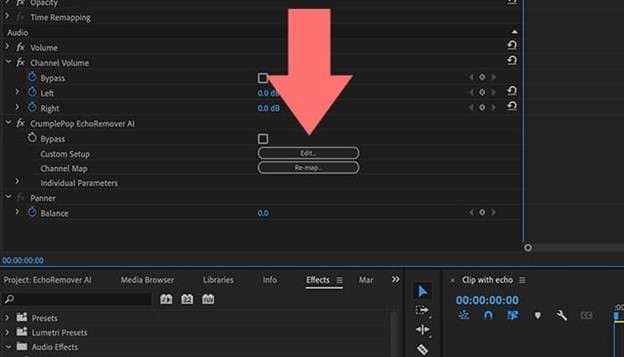
After selecting the file (audio or video) you would like to clean up, double-tap on EchoRemover AI or grab and drop the plugin onto your audio clip. Next, go to the Effects tab in the top left corner, and you will see fx Crumplepop EchoRemover AI. Click the large Edit button, and the EchoRemover AI user interface will appear.
Now you are set to remove echo from your audio file in Premiere Pro. Also, if you are using Adobe Premiere or Audition and notice that EchoRemover AI doesn't appear immediately after installation, that means that the although the plugin is installed, there is one more step to complete before you can use it.
Just go to Premier Pro > Preferences > Audio. You will need to use the Premier's plugin manager.
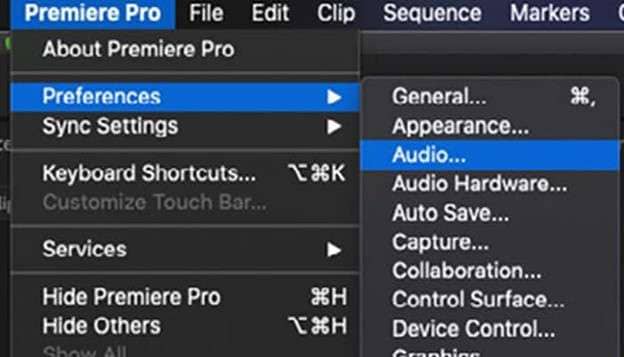
When the window opens, select from the list of audio plugins installed on your computer after clicking "Scan for Plugins," then scroll down to CrumplePop EchoRemover AI and ensure it is not disabled, then click ok.
Al alternate route is to find the Audio Plugin Manager in the Project Panel. Select the Audio Plugin Manager from a drop-down menu that pops up when you click on the three bars beside the Effects Panel.
These are the steps to remove reverb from audio using Adobe Premiere.
Conclusion
If you took the time to review this guide, you will have no excuse to serve your audience a murky audio/video filled with echo, reverberations and unpleasant background noises.
Although some tools described above may be a bit complicated if you are looking for a quick cleaning job, you can count on tools like Kwicut to come through with quick and high-quality audio clean-up. It is also a bonus when they are completely free and uses AI to auto-detect all kinds of unwanted noise, including echoes and reverbs, and remove them accurately, giving you a clean audio file.
You also don't have to go through the hurdles of installing or enabling plugins to get them to work, as none of that is required.

