Shotcut is a cross-platform video editor that supports hundreds of audio and video formats and codecs, thanks to FFmpeg. It also offers a sleek and intuitive interface, with multiple dockable and undockable panels, such as media properties, playlist, filter, history, encoding, jobs, and more. You can also use Shotcut to capture video from various devices, such as webcam, screen, audio, network stream, etc. Moreover, Shotcut supports resolutions up to 4K and features a rich set of filters and effects that you can apply to your videos.
In this tutorial, we will show you how to add text in Shotcut in videos in a few simple steps. We will also introduce a useful tool that you may need if you want to transcribe your video to text or clone your voice with AI.
In this article
Part 1: What is Shotcut?
Before we dive into the nitty-gritty of Shotcut add text to videos, let's familiarize ourselves with Shotcut application. Shotcut is a free, open-source, cross-platform video editor that was originally conceived in 2004 by Charlie Yates, an MLT co-founder and the original lead developer. The current version of Shotcut is a complete rewrite by Dan Dennedy, another MLT co-founder and its current lead.
Shotcut supports hundreds of audio and video formats and codecs thanks to FFmpeg.You don’t need to import your files into Shotcut, which means native editing without any quality loss or conversion. You can also work with multiple formats, resolutions, and frame rates within a project. Shotcut has a sleek and intuitive interface that allows you to customize your workspace with multiple dockable and undockable panels. You can access detailed media properties, recent files with search, playlist with thumbnail view, filter panel, history view, encoding panel, jobs queue, and melted server and playlist from the interface. You can also drag and drop assets from your file manager into Shotcut.
Shotcut offers a variety of basic and advanced features and effects that can enhance your video editing experience. Also, the app is available for Windows 10 & 11 (64-bit), Windows 7 (32-bit), macOS universal (64-bit), and Linux portable tar (64-bit). What sets Shotcut apart is its user-friendly interface combined with its potent editing capabilities. Whether you're editing clips for YouTube, crafting a promotional video, or producing a short film, Shotcut is a reliable companion. The convenience it offers in terms of customization and creative control is unrivaled.
Part 2: How to Add Text to Videos in Shotcut?
All those who have been wondering “how to add text in shotcut”, this part will answer it all. There are two main ways to add text to videos in Shotcut: using the Text: Simple filter or the Text: Rich filter. The Text: Simple filter allows you to add plain text with basic formatting options, while the Text: Rich filter allows you to add formatted text with more options such as alignment, background, outline, shadow, and HTML code. Here are the steps to add text to videos in Shotcut using either of these filters.
Step 1: Launch Shotcut and open your video file
You can drag and drop your video file into the Shotcut window or use the Open File button on the toolbar. Your video will appear in the Source tab on the left panel. You can preview your video and use the playback controls to navigate through it.
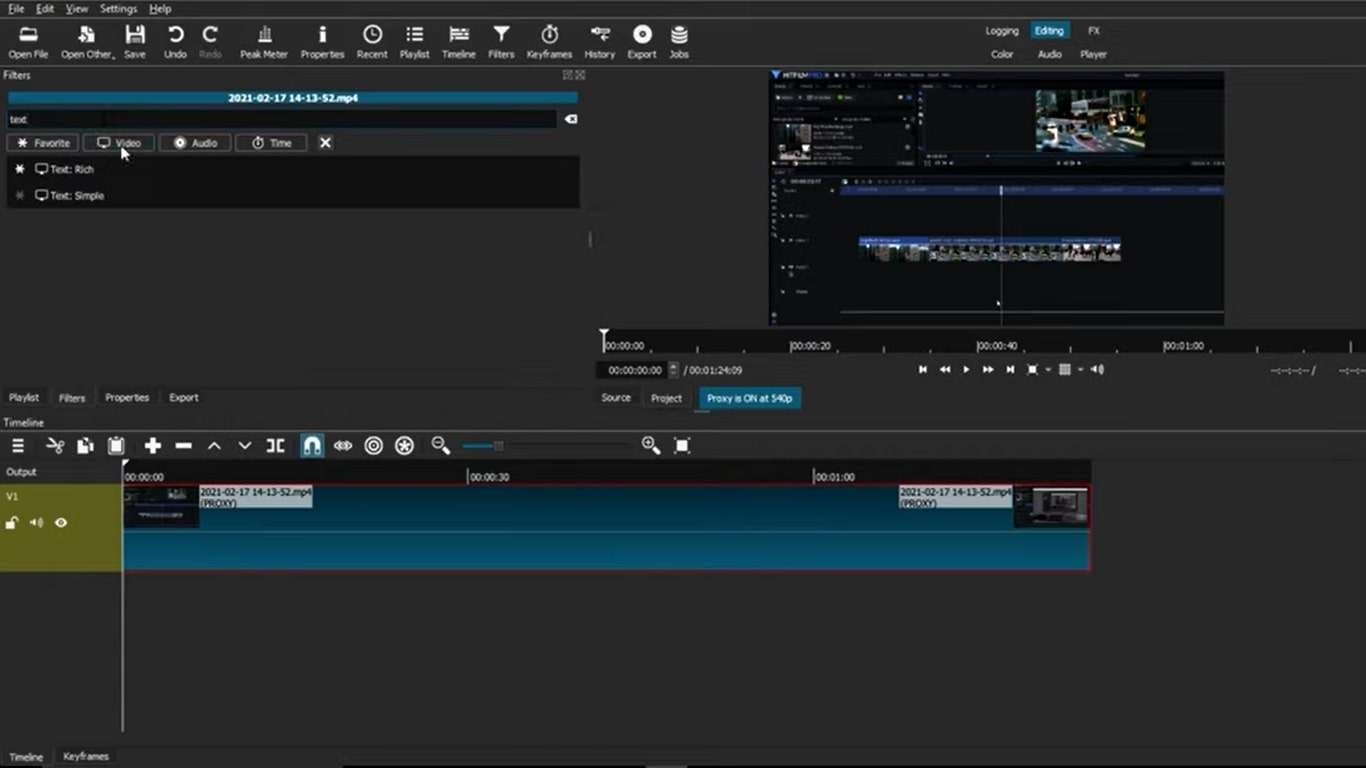
Step 2: Add your video to the timeline
You can drag and drop your video from the Source tab to the timeline at the bottom of the window or use the Append button on the toolbar. Your video will appear as a clip on the timeline. You can zoom in or out of the timeline using the slider on the bottom right corner. You can also trim your video by dragging the edges of the clip.
Step 3: Add a text filter to your video
You can either use the Text: Simple filter or the Text: Rich filter depending on your preference. To add a filter, select your video clip on the timeline and click on the Filters tab on the right panel. Then click on the + button and choose either Video > Text: Simple or Video > Text: Rich from the list of filters.
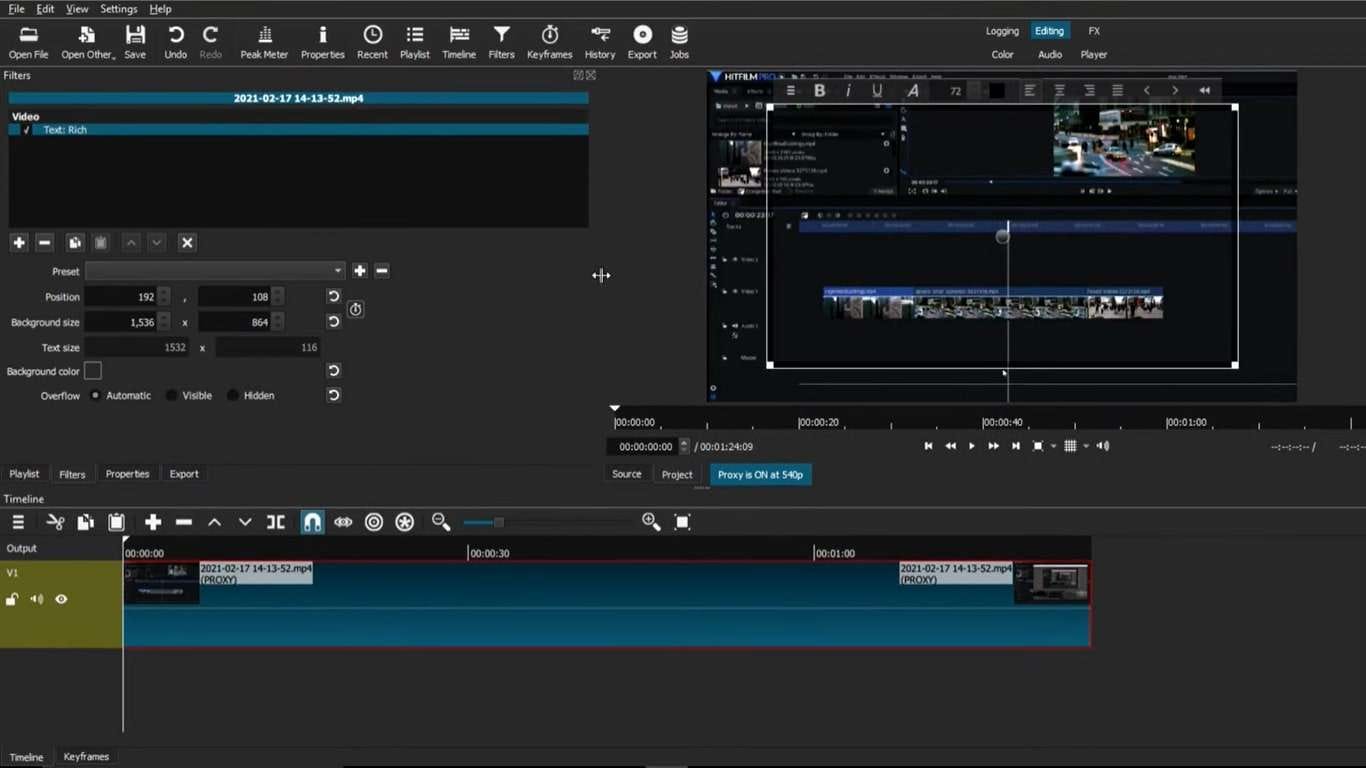
Step 4: Enter your text and adjust its settings
After adding a text filter, you will see a text box on the preview window where you can enter your text. You can also adjust various settings for your text such as position, size, font, color, style, animation, and more. The settings will vary depending on which filter you use.
If you use the Text: Simple filter, you can adjust the following settings.
- Preset: You can choose from a list of predefined presets for your text such as lower third, title safe area, top left, top center, top right, etc.
- Text: You can enter your text here. You can also use placeholders such as %timecode%, %frame%, %filedate%, %filename%, etc. to display dynamic information.
- Size: You can adjust the size of your text using the slider or by entering a value in pixels.
- Font: You can choose a font for your text from a list of available fonts on your system.
- Color: You can choose a color for your text using the color picker or by entering a hex code.
- Style: You can apply bold, italic, or underline style to your text by clicking on the corresponding buttons.
- Position: You can adjust the position of your text on the screen using the X and Y sliders or by entering values in pixels. You can also drag and drop your text on the preview window to move it around.
- Offset: You can adjust the offset of your text from its position using the X and Y sliders or by entering values in pixels.
- Opacity: You can adjust the opacity of your text using the slider or by entering a value between 0 and 100.
- Blur: You can apply a blur effect to your text using the slider or by entering a value in pixels.
- Animation: You can choose an animation for your text from a list of options such as none, scroll up, scroll down, scroll left, scroll right, typewriter, etc.
If you use the Text: Rich filter, you can adjust the following settings.
- Preset: You can choose from a list of predefined presets for your text such as lower third, title safe area, top left, top center, top right, etc.
- Text: You can enter your text here. You can also use placeholders such as %timecode%, %frame%, %filedate%, %filename%, etc. to display dynamic information.
- Size: You can adjust the size of your text using the slider or by entering a value in pixels.
- Font family: You can choose a font family for your text from a list of available fonts on your system.
- Font weight: You can choose a font weight for your text from a list of options such as normal, bold, bolder.
- Font style: You can choose a font style for your text from a list of options such as normal, italic, oblique, or inherit.
- Color: You can choose a color for your text using the color picker or by entering a hex code.
- Background color: You can choose a background color for your text using the color picker or by entering a hex code.
- Outline: You can apply an outline to your text by checking the box and adjusting the width and color of the outline using the sliders or by entering values in pixels and hex codes.
- Shadow: You can apply a shadow to your text by checking the box and adjusting the blur, color, and offset of the shadow using the sliders or by entering values in pixels and hex codes.
- Alignment: You can align your text horizontally and vertically using the buttons or by entering values in pixels.
- Position: You can adjust the position of your text on the screen using the X and Y sliders or by entering values in pixels. You can also drag and drop your text on the preview window to move it around.
- Size: You can adjust the size of your text on the screen using the W and H sliders or by entering values in pixels. You can also drag the corners of your text on the preview window to resize it.
- Opacity: You can adjust the opacity of your text using the slider or by entering a value between 0 and 100.
- HTML: You can edit the HTML code of your text by clicking on the HTML button. You can use HTML tags and attributes to format your text as you like.
Step 6: Adjust the duration and timing of your text
By default, your text will appear throughout the entire video clip. However, you can change the duration and timing of your text by adjusting its position on the timeline. You can drag the edges of the filter bar to shorten or extend its duration. You can also drag the filter bar to move it along the timeline. You can also use keyframes to change the settings of your text over time.
Step 7: Preview and export your video with the text
After adding and editing your text, you can preview your video with the text on the preview window. You can use the playback controls to play, pause, stop, rewind, or fast forward your video. You can also use the spacebar to play or pause your video. If you are satisfied with your video, you can export it by clicking on the Export button on the toolbar. You can choose a preset format for your video such as MP4, MOV, AVI, etc. or customize your own settings such as resolution, frame rate, codec, bitrate, etc. You can also choose a destination folder for your video file. Then click on Export File to start exporting your video.
Part 3: Bonus Tip: A Useful Tool You May Need
While Shotcut is a great tool for adding text to videos, there may be some situations where you need more than just text. For example, you may want to transcribe your video to text or you may want to clone your voice with AI to create realistic voiceovers. In these cases, you may need a tool that can help you with these tasks easily and quickly.
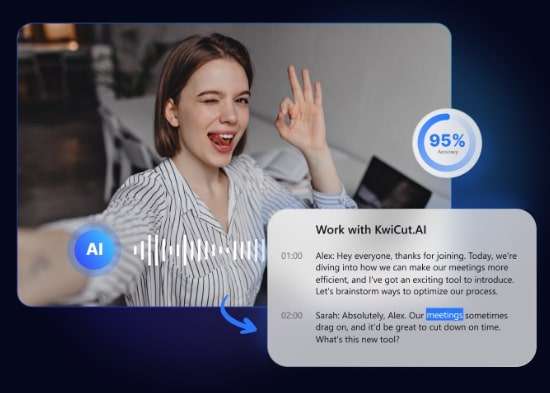
That’s why we introduce you to KwiCut, an online AI-powered video editing platform that can help you create amazing videos with ease. It is a tool that can help you create amazing videos with minimal effort and time. Whether you want to transcribe video to text, clone voice with AI, or edit video online, KwiCut can help you with all these tasks and more.
Key Features and Functions
- KwiCut can automatically transcribe any video to text in over 100 languages with high accuracy and speed. You can also edit, format, and export your transcript as TXT, PDF, SRT, VTT, etc.
- With KwiCut, you can clone any voice with AI using only a few minutes of audio samples. You can create realistic and natural-sounding voiceovers, dubbing, narration, etc. with KwiCut’s advanced voice cloning technology.
- The app allows you to edit your video online with simple and intuitive tools. You can trim, crop, rotate, merge, split, add music, add subtitles, add filters, add transitions, add stickers, add emojis, and more to your video with KwiCut’s online video editor.
- You can also share your videos online with one click. You can upload your video to YouTube, Facebook, Twitter, Instagram, TikTok, and more platforms with KwiCut’s online video sharing feature.
Conclusion
In this post, we’ve shown you how to add text in Shotcut using the Text: Simple filter or the Text: Rich filter. We have also shared a bonus tip on how to use KwiCut, an online AI-powered video editing platform that can help you transcribe video to text and clone voice with AI. So, the next time you embark on a video editing adventure, remember that Shotcut and KwiCut are your trusty companions. With these tools at your disposal, your videos are bound to stand out, telling stories that captivate, inform, and inspire.

