
Transcript plays a pivotal role in ensuring inclusivity and expanding the reach of any video content. As a major hub of all video creation, YouTube offers various methods to generate auto captions and accurate transcripts. Some of these methods are more effective than others. This comprehensive guide aims to provide practical insights, without unnecessary mumbo-jumbo, on the efficient methods to get precise and accurate transcripts for YouTube videos. So, read on as we delve right into different techniques to generate YouTube transcript easily.
In this article
Part 1. Is it legal to use a transcript of any YouTube Video?
Well, it depends. YouTube’s terms of service forbid uploading content that infringes on the rights of others. These include copyrights, trademarks, and trade secrets. This means you cannot use someone else’s intellectual property, which includes a video transcript, without their permission. But, some content creators allow fair use of their content, including transcripts. Limited quotes may also be made under fair use or exceptions to copyright violations.
Part 2. Using YouTube's Auto Caption Feature
YouTube uses modern speech recognition technology to automatically create captions for all your videos. While this feature provides a convenient way to get a video transcript, these captions generated by machine learning algorithms aren’t always correct. Longer videos, in particular, tend to perform poorly in this regard. YouTube encourages content creators to manually add professional captions before publishing any video.
Still, this auto YouTube Subtitle Creator can save time and get you a quick video transcript. Below is a quick step-by-step guide to enable automatic subtitles on YouTube.
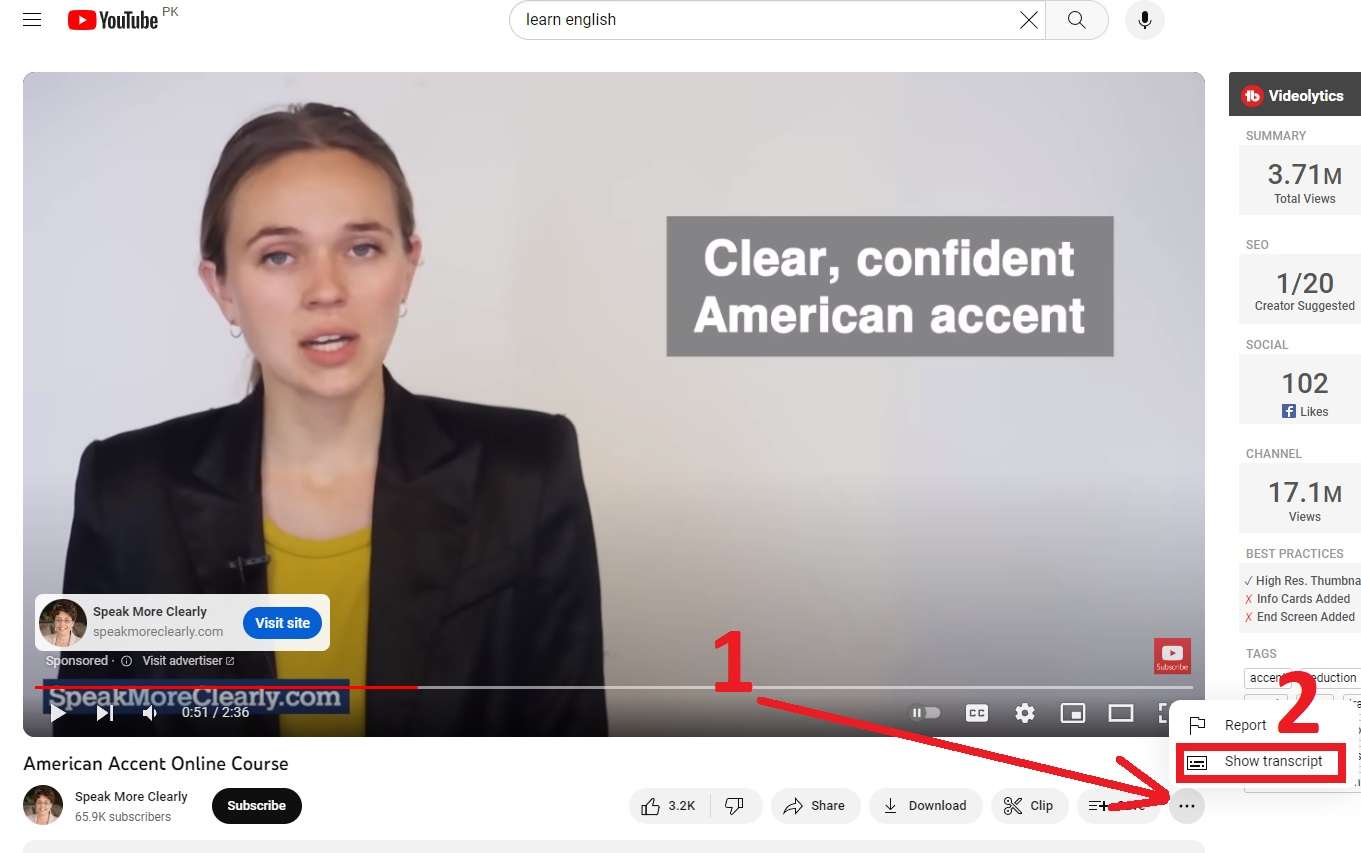
Step 1 – Accessing YouTube Video Transcript
Begin by navigating to any YouTube video. Look for the three dots located just below the video, adjacent to the download option (as you can see in the screenshot below). Then click on Show Transcript.
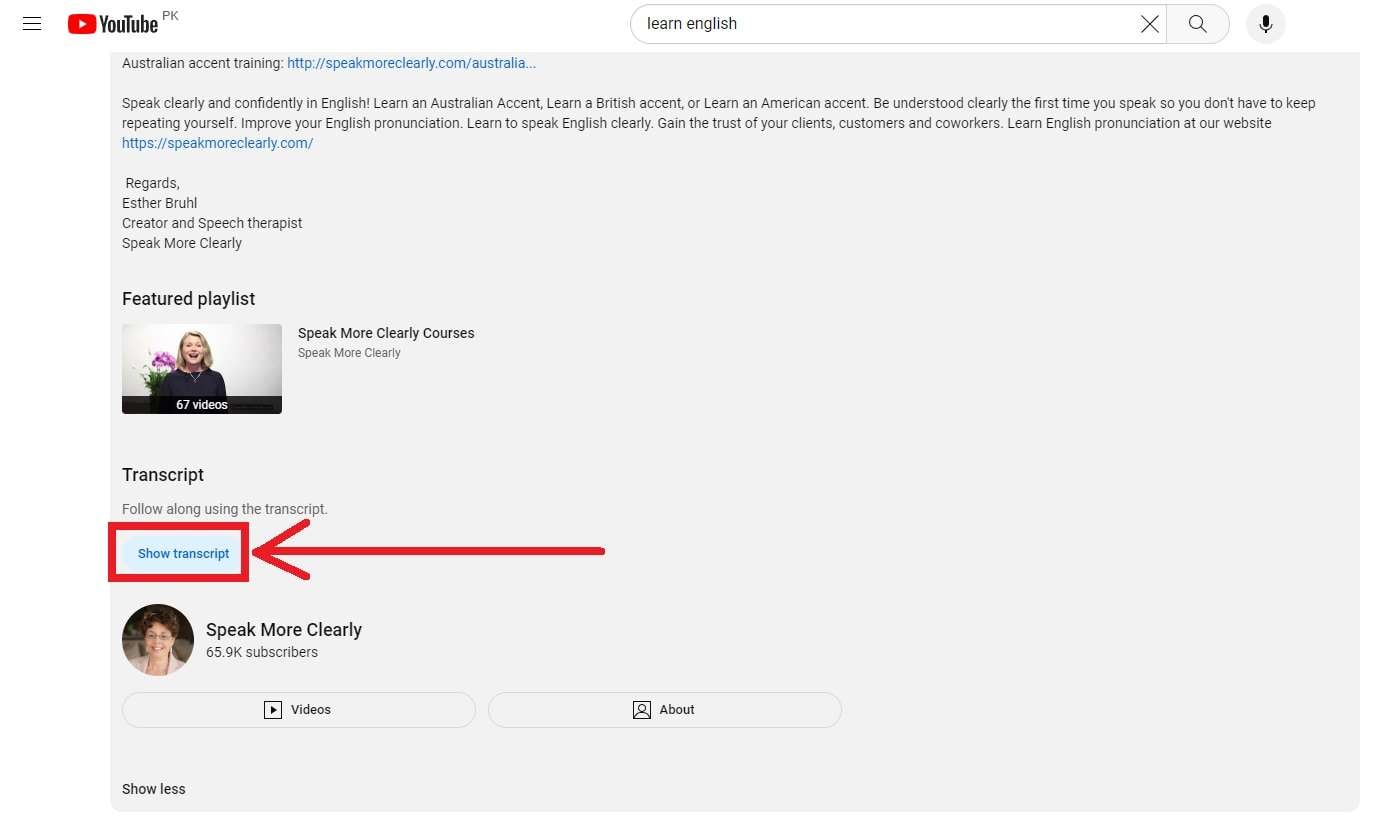
Step 2 – Showing YouTube Video Transcript
Now click on Show Transcript at the end of the video AGAIN.
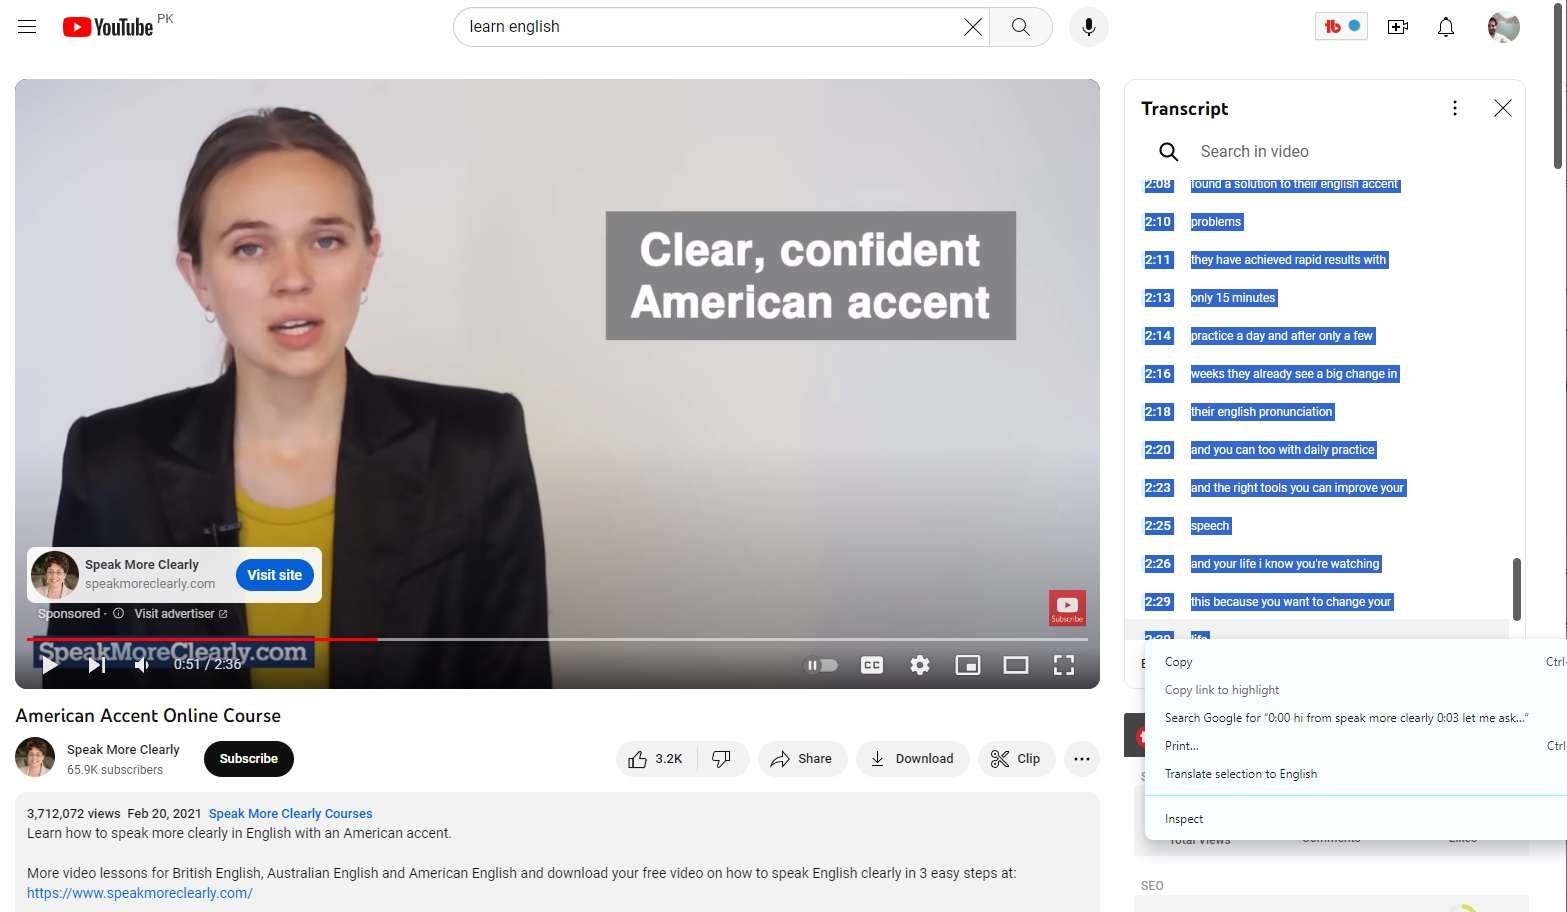
Step 3 – Copying YouTube Video Transcript
Unfortunately, there is no other way to save YouTube's auto caption. You have to resort to the good old copy-and-paste technique. When the transcript opens on the top right-hand side of the screen, select all the text. Subsequently, copy the selected text and paste it into a Word document or any other word editor of your choice.
If you are the owner of a video, you can download transcripts in text form directly from YouTube. Follow the instructions below to do that:
- Sign in to your YouTube channel
- Go to YouTube Studio
- Choose the “Subtitles” option from the left menu
- Select a video you would like to download subtitles for
- Hover your cursor over “Duplicate & Edit” to see the “three dots” menu
- Select download
- Select file type and the transcript will start downloading in that text format.
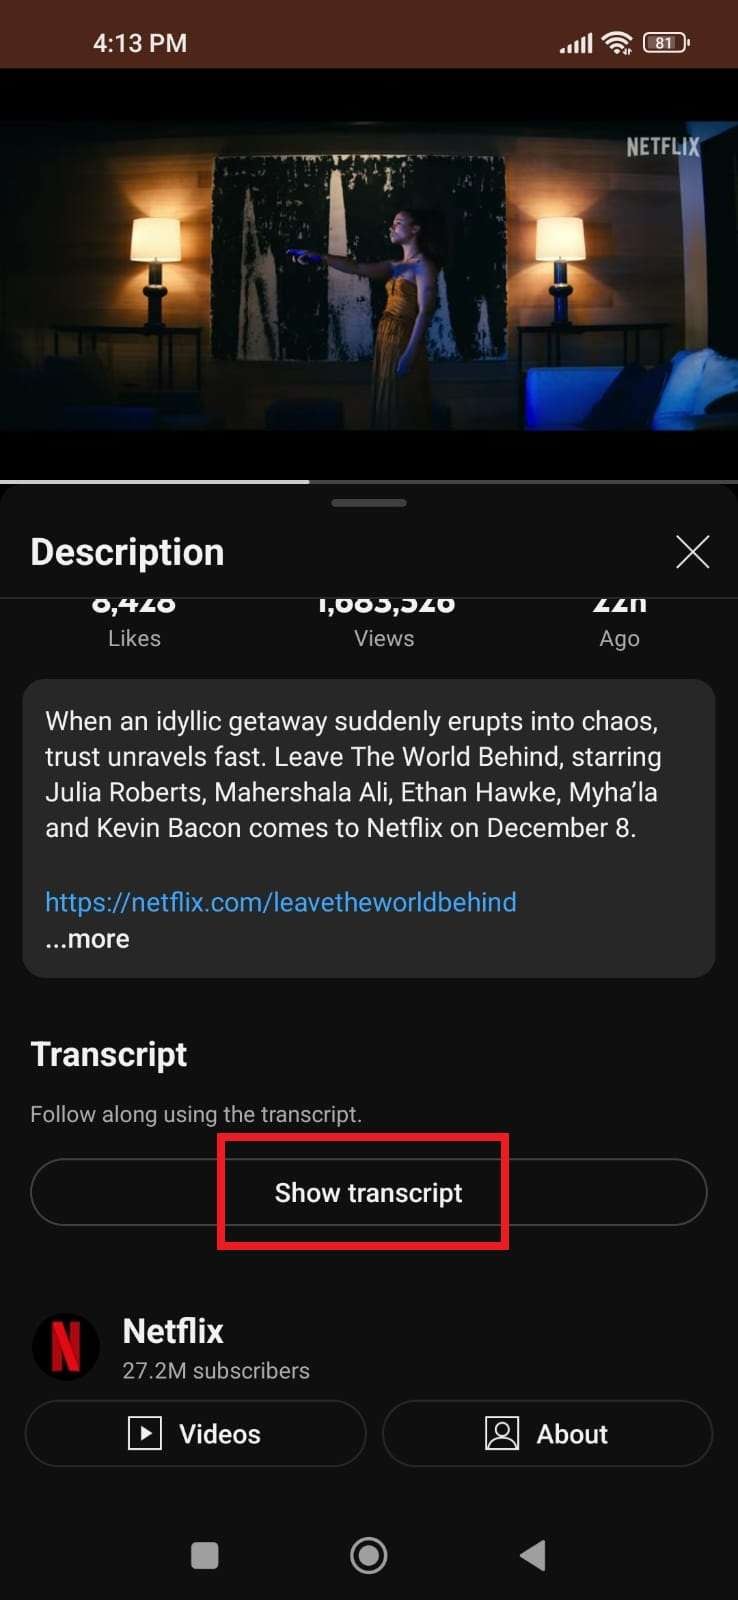
How to Find Transcripts On Your Phone
When you are using an iOS or Android smartphone, you can still generate YouTube transcript easily. Follow the steps below:
- Open the Youtube official app on your phone
- Click the “More” button
- Select “Show Transcript” and the video will start showing the entire transcript
Part 3. Third-Party YouTube Transcript Generators
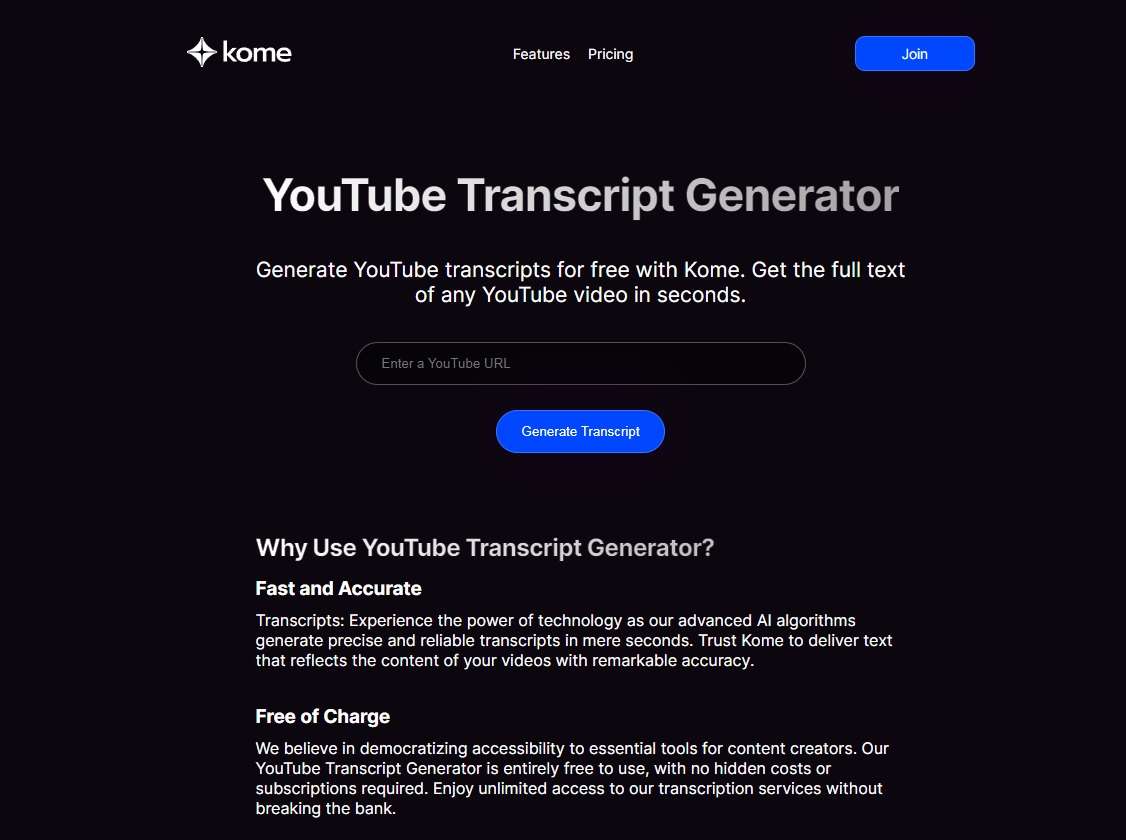
While YouTube automatic captions are convenient, third party tools can be more accurate. Kome is one such third-party YouTube subtitle generator. It’s a user-friendly, efficient tool that simplifies the process of generating accurate YouTube subtitles. With a simple, user-friendly interface, Kome offers a convenient solution for content creators who want accurate transcripts. It’s absolutely free of charge, which means there are no subscription charges or hidden fees. You can use the service as many times as you want. What’s more, the Kome Transcript generator supports more than 120 languages. These include all the popular languages like English, Spanish, French, German, Korean, Mandarin, etc.
Below is a step-by-step guide to legally generate transcripts for any YouTube video using Komi.ai.
Step 1 – Paste Video URL
The first step is to copy and paste the URL of the video you want to transcribe into the box you see on the main page.
Step 2 – Generate Transcript
Now, generate a transcript by clicking the blue “Generate Transcript” button under the URL box. Wait a few moments as Kome generates your transcript.
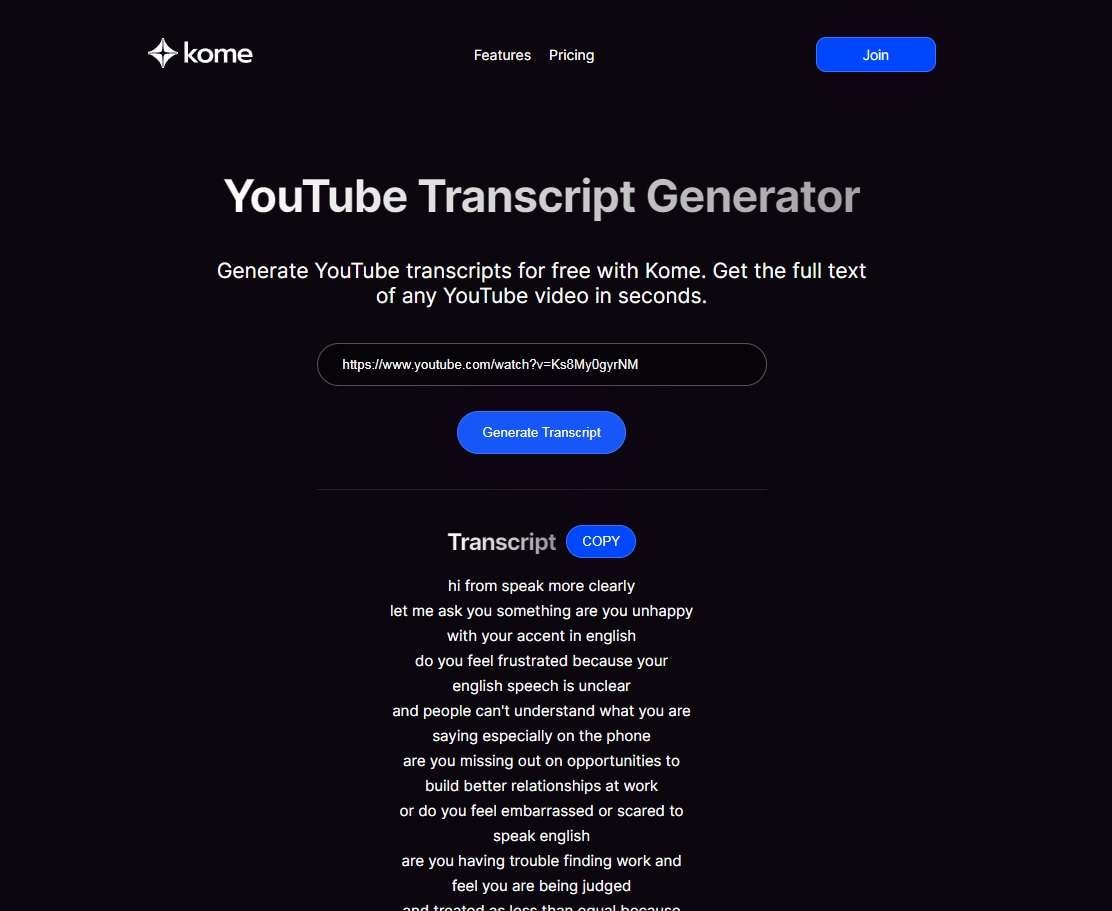
Step 3 – Copy and Use
Copy the generated transcript using the blue copy button and paste it into a text editor of your choice. Your transcript is ready for use.
Part 4. Create Better, Accurate Transcripts with Wondershare KwiCut
If you want to ensure your videos have accurate transcripts, KwiCut is the answer.
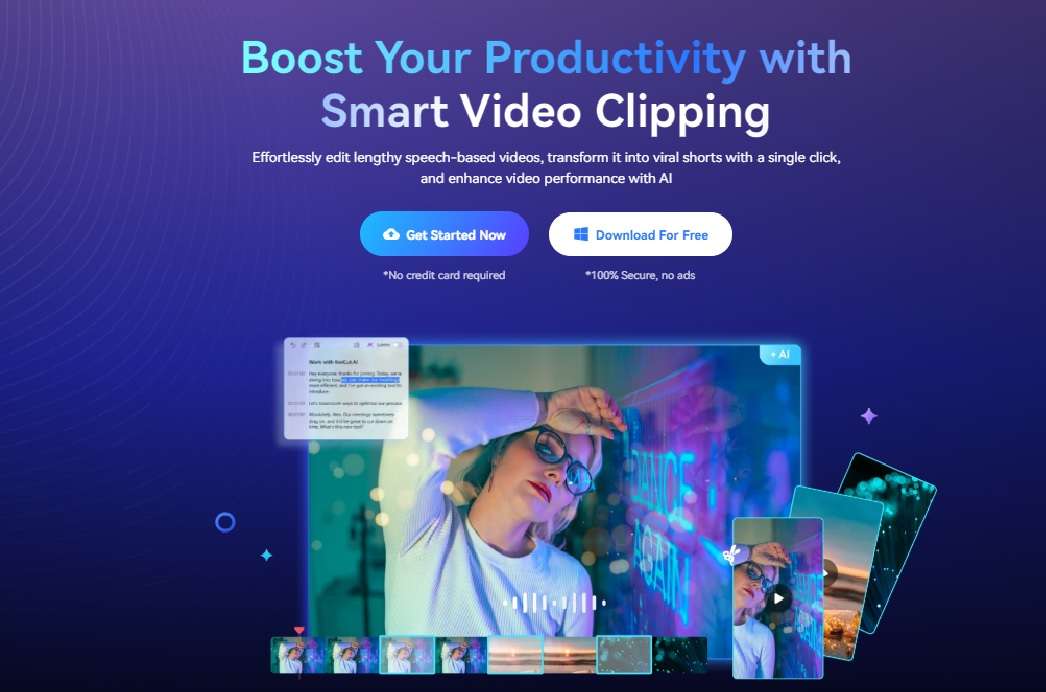
Wondershare KwiCut: Transforming Talking Head Video Editing For The Future
Kwicut is mainly an AI-powered video editor. The platform lets you create your own high-quality videos with the help of AI in a matter of minutes. It’s particularly suitable for talking head YouTube videos and clips. With the help of various AI solutions, KwiCut simplifies tasks like transcription, audio enhancement, voice cloning, and social sharing. You can use this platform online on any browser or download its Windows version for offline editing. An iOS version is also in the pipeline.
Best Practices for YouTube Subtitle Recreation with KwiCut
1. Edit Video Seamlessly Like It's Text
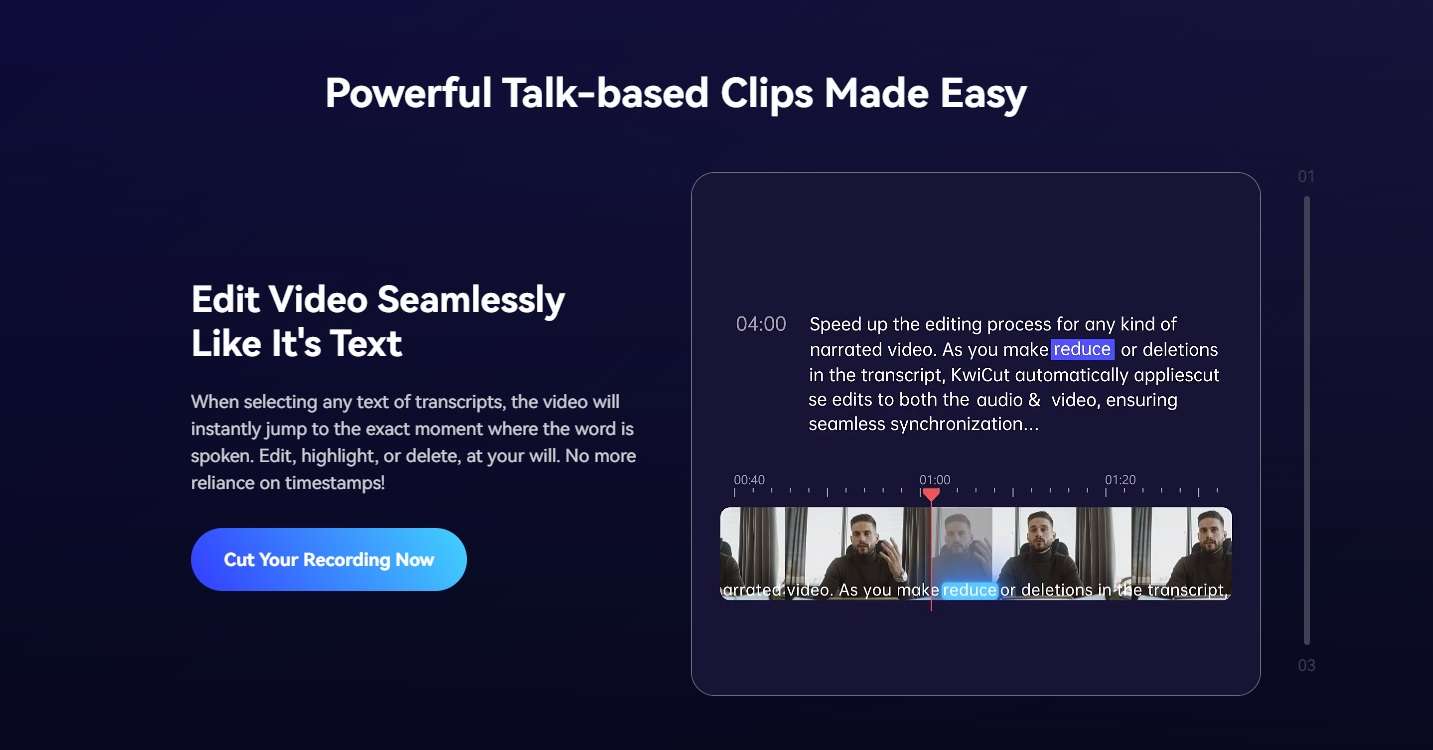
KwiCut’s innovative approach to YouTube subtitle recreation simplifies the editing process dramatically. By treating video editing like working with text, you can seamlessly edit spoken content in a manner similar to editing written documents. This practicality allows for precise adjustments, ensuring the subtitles accurately reflect the spoken content without the complexities of traditional video editing.
2. Remove Hum, Filler Words in One Click
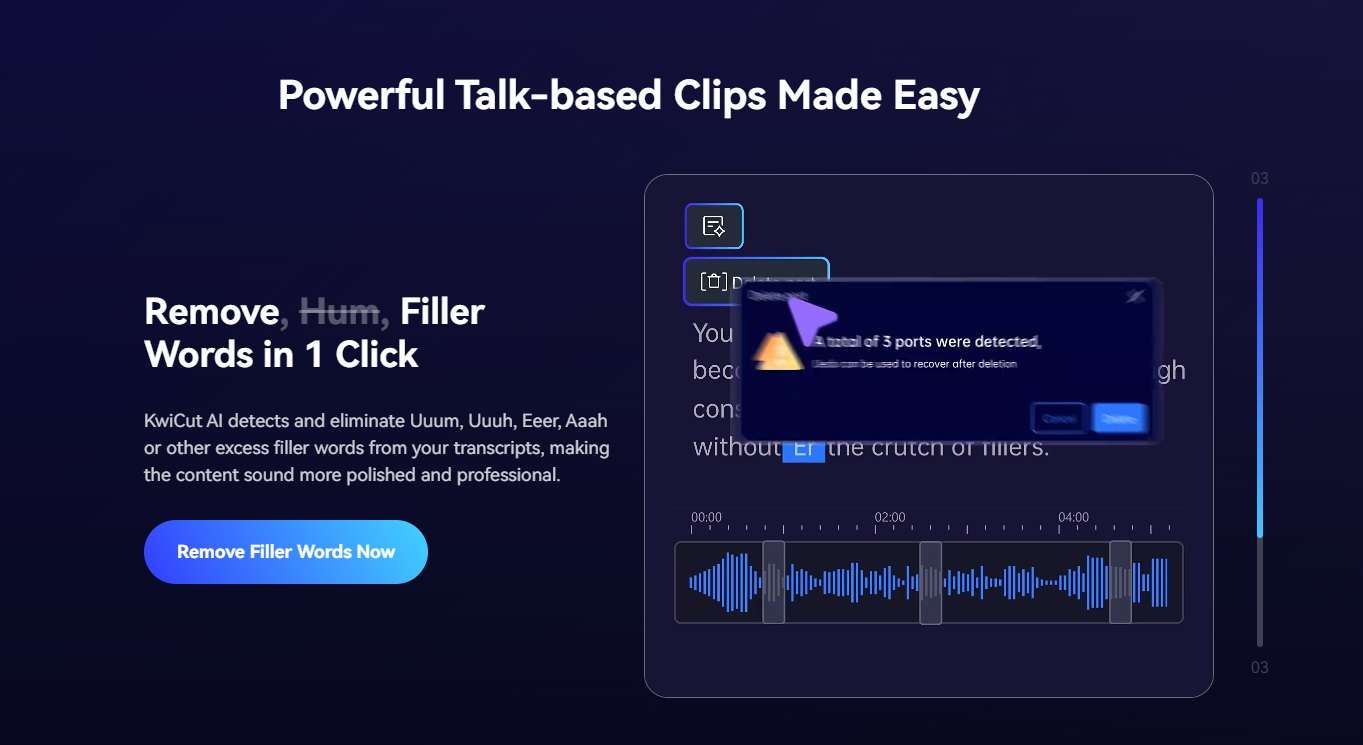
KwiCut’s one-click removal of hum and filter words like hmmm, aaaah, etc. streamlines the workflow. This practical feature saves a significant amount of time and effort, as users no longer need to meticulously edit out unwanted noises or unnecessary words manually. Automating this process lets you focus on the content’s quality and message, enhancing the overall viewer experience.
3. Achieve Studio-quality Audio with AI Noise Cancellation Algorithms
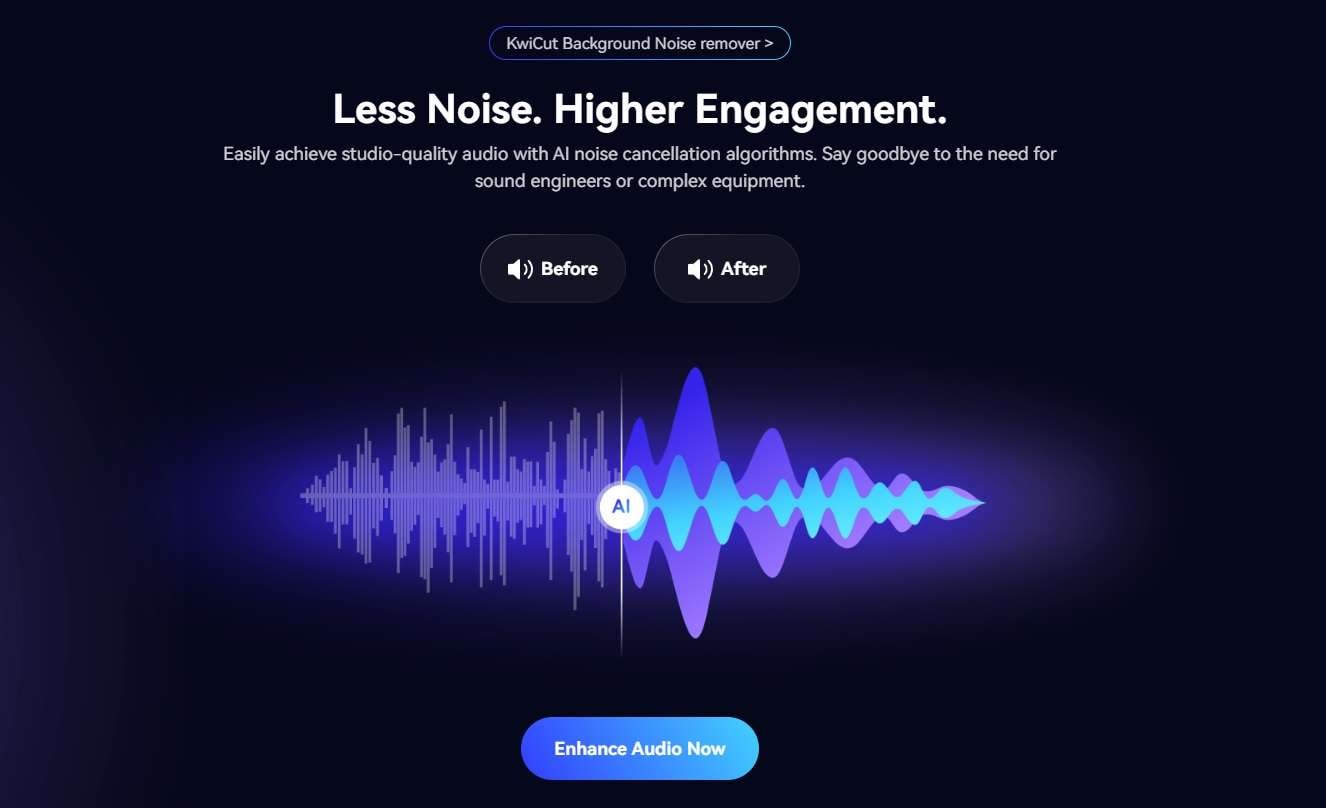
KwiCut helps you achieve studio-quality audio thanks to its advanced AI noise-cancellation mechanism. By eliminating background noise, echoes, and other similar disturbances with one click, KwiCut ensures crystal-clear audio in the final video. This practical application is invaluable if you want to deliver professional-grade content without having access to a professional studio.
Conclusion
Automatic YouTube subtitles significantly enhance a video’s reach and inclusivity. YouTube, the world’s largest video-sharing platform, has simplified this process of generating transcripts. This allows you to access transcripts easily. While YouTube caption generator tools can be helpful, we advocate for a more comprehensive approach to video creation, best achieved through KwiCut.
KwiCut lets you edit videos like a text document, ensuring accurate transcripts and improved video quality. Its unique features also enable you to remove unnecessary words from your transcript with a single click, providing an efficient video editing experience. So, give it a try!

