KwiCut User Guide
Get Started with KwiCut
If you want to explore the unique features of video editing and are tired of background noises from your audio or video, then enhance your creativity in editing skills through KwiCut. Here is the step-by-step guide where you can upload and use the KwiCut software to transform your content within a few steps.
01 Product Brief
KwiCut is a cutting-edge audio and video editing tool powered by GPT-4.0 AI technology.
It offers noise remover, voice cloning in any human tone or pitch, and auto transcription for easy script generation. Whether you're creating tutorials, podcasts, or social media posts, KwiCut's features like AI Copilot help generate high-quality text efficiently.
02 Open KwiCut
Suppose you are a newbie to the KwiCut tool and want to avail its features for free, click the download button below and sign in to it.
Note:
If you're seeking a more user-friendly experience with KwiCut, simply access KwiCut online to initiate the process and enjoy a seamless journey.03 Interface Walkthrough
If you want to edit your audio or video project and don't know where to start, read the following instructions that will help you use each feature easily.
Before Login
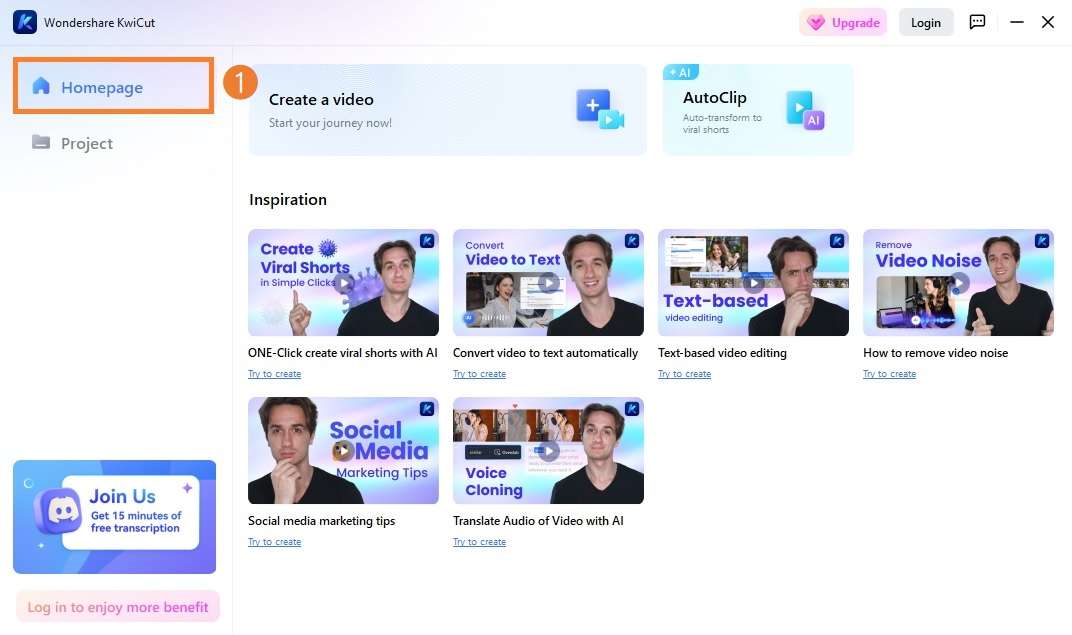
- Homepage: Create New Project from the top, and Login to unlock full features.

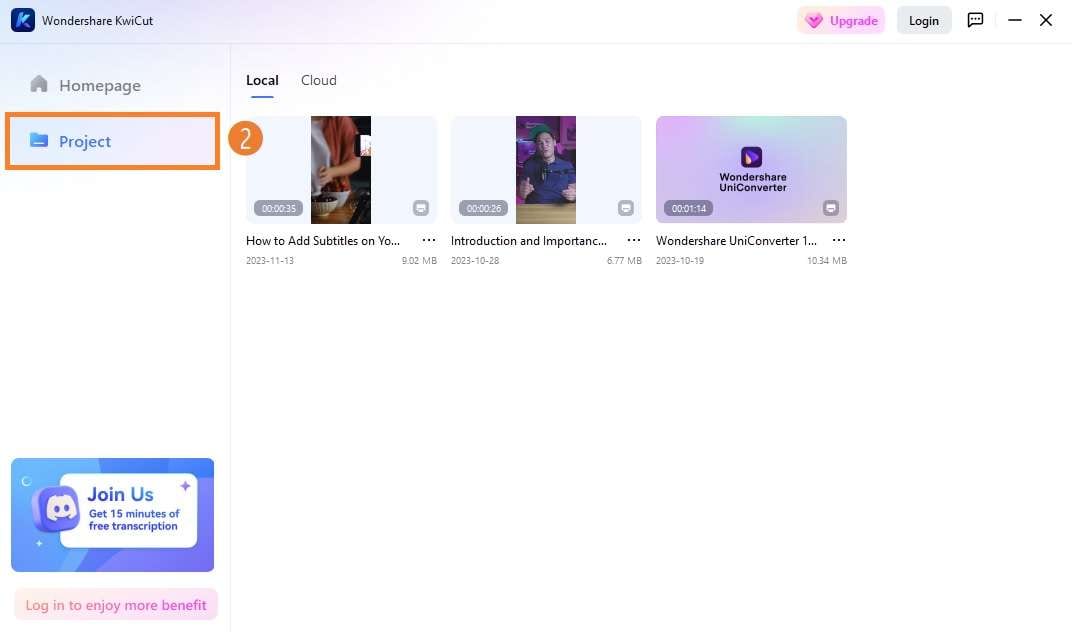
- Project: Access all your brilliant video projects here. Both desktop and online projects included after login.

After Login
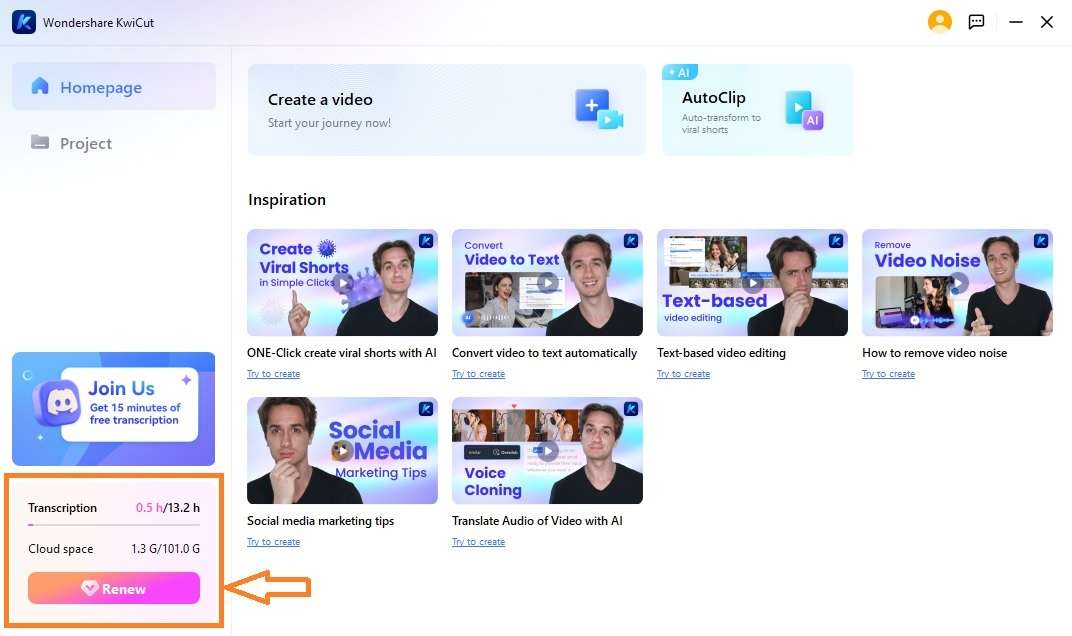
- Membership Benefits: Stay in control of your transcription time and cloud storage with KwiCut's premium features. For detail membership info, please check the KwiCut pricing plan.

Note:
To get detailed instructions for registering and log in, please refer to this page -> Register and Login to KwiCutEditing Interface
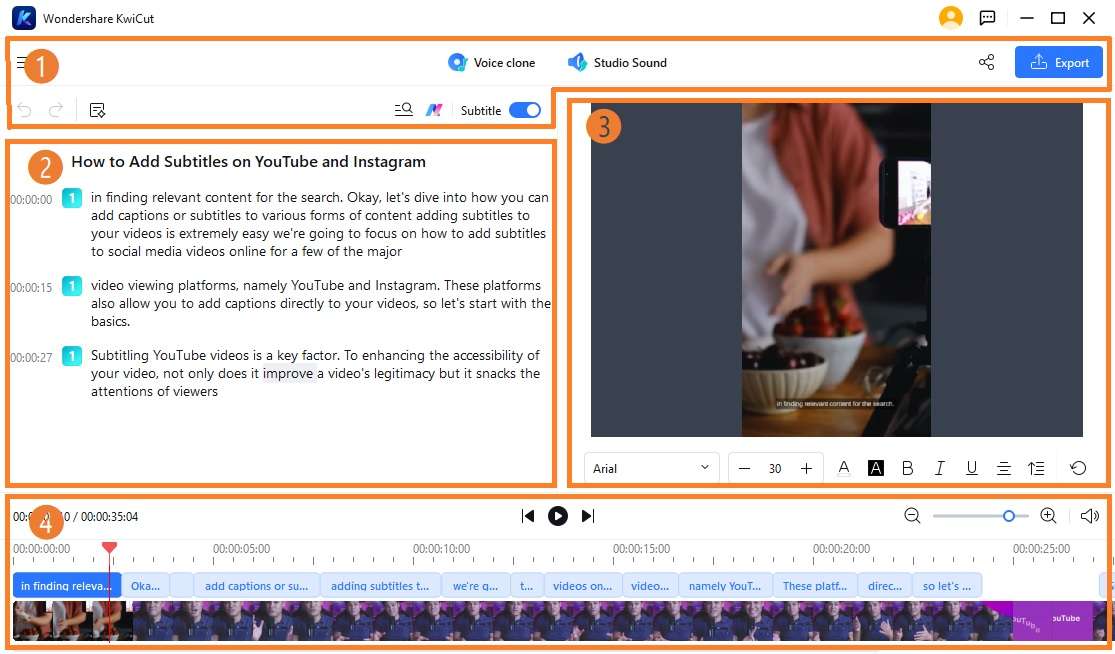
- Feature bar: At the bottom is the Feature bar, including powerful features Voice Clone, Studio Sound, AI Copilot, etc.
- Script Editing: The left side of the center of the screen is automatically transcribed text, on which you can click for quick jumps.
- Screen Preview: The right side is the corresponding video image. You can adjust the layout, font style, font name, and font size of the transcribed text.
- Timeline: At the bottom is the timeline and automatically generated subtitles. You can adjust the zoom in/out and volume of the sound from the editing interface.


